This tutorial describes in detail how to build an AI Avatar for experienced developers.
If you don’t have any experience, you can start here: Set Up an AI Avatar.
 Fectar AI Avatar pipeline – Feb 2025
At this moment our best practice for getting high quality and low memory avatars in Fectar is buying and/or customising Reallusion characters, pulling them through our Unity pipeline and exporting it as a .glb with animations, ready for Fectar Studio.
- Buy pre-made: ActorCore
- Edit/create/customise: Character Creator
Software and packages you need to get started:
- Reallusion Hub
- Character Creator version the Fectar team is now using: CC4.5
- Unity Hub
- Unity version the Fectar team is now using for the avatars: 2022.3.56f1
- Unity Auto Setup latest version for Universal 3D with Unity Package Manager in your project
- Fectar Creator Tools Package in your Unity project – ask Fectar support to send you these folders
- Git
- UnityGLTF with Unity Package Manager (Git link) in your project
- Unity: Import Package… > Custom > AvatarsExport.unitypackage for the latest animation setup of the Fectar team – ask Fectar support to send you these folders
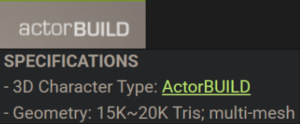
ActorBUILD premade
Pipeline time estimate: 10 minutes
- At the ActorCore website buy a character with the ActorBUILD type (find type under specifications in asset description):

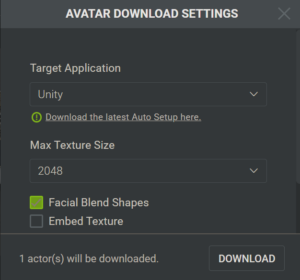
- Go to your Inventory page and download the asset (pack). Use these settings and click download:

- Navigate to chapter: Unity
ActorBUILD custom
Pipeline time estimate: 15-60 minutes
- Launch Character Creator. To start with a basic character, navigate to the Content tab > Actor button > Template tab > Character folder…
- Look for a Character with the actorBUILD type (not actorSCAN or CC+)

- If you wish to change their shape, navigate to the Modify tab > Character tab > Edit Mesh and use the tools to achieve your desired effect.
- If you wish to change their materials and textures, navigate to the Modify tab > Materials list tab and use the tools to achieve your desired effect.
Once satisfied, continue to chapter: Unity
Unity
Import
- Create a new Unity project and install all required packages or open your existing Unity project.
- Open your download folder on top or the side of the Unity editor and select the folder of the character you want to work on > drag it onto the Assets folder in Unity:


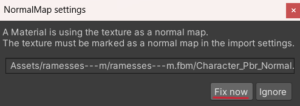

If there is a pop-up with NormalMap settings, click Fix now.
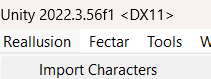
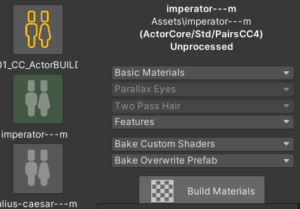
- Open the CC/iC Importer 3D window by clicking on the Reallusion tab > Import Characters:

- Find your new character import name as a square on the left and click it, it will become green.
If your new character is not visible, try clicking the Reload character list button

- Select these options and click Build Materials:

- Open a new scene to preview your character prefab with this button


If it is not visible, simply drag your character Prefab from the Project tab into the scene.
Materials
- Select the Prefab in the scene and unfold its hierarchy. Now click on one of the children > Inspector tab > unfold the Material component and select UnityGLTF/PBRGraph.
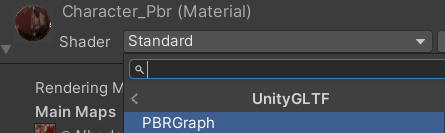

If the error pops up, click OK.
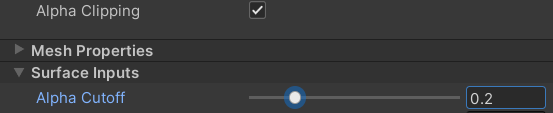
- Now navigate to the Materials folder of your character and check Alpha Clipping > set Alpha Cutoff to around 0.2 so that the eye lashes look good.

- Set the Roughness to 1.
- Duplicate the material and add the suffix _Eye. Drag it onto the Eye mesh and set the Roughness to 0.05.
Animations
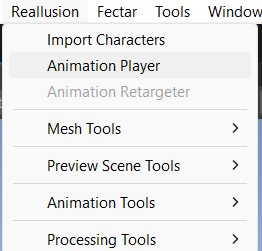
- Open the Character Preview Tools with the Reallusion tab > Animation Player. It will pop up as a user interface in the scene:
- Select the Prefab in the scene > select the scene Model > select Idle01_N as Animation:
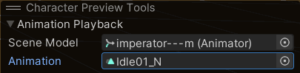
- In the Inspector tab, select All_Animations as the Animation Controller (from the AvatarsExport.unitypackage).


Export
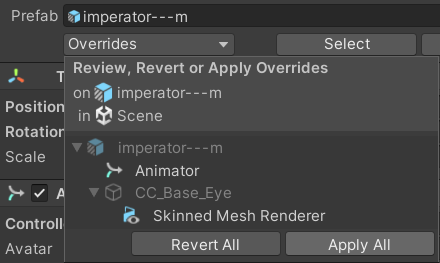
- In the Inspector tab, click Overrides > Apply All to save all changes to this prefab
- Save the scene with a logical name.
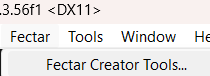
- Open the Fectar Creator Tools tab from the Fectar tab > Fectar Creator Tools…

- Validate Scene, if everything is OK (ignore the warnings for Animator IK pass / No cameras) > Export Scene.
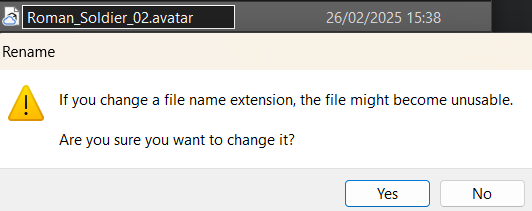
- Your export will open in your Windows Explorer folder. Make a new folder for your avatar (choose a suitable name for them) and save the .avatar in there.
- Rename it from .glb to .avatar and click Yes.
- Import in Fectar Studio in the File Manager > [folder of your choosing]
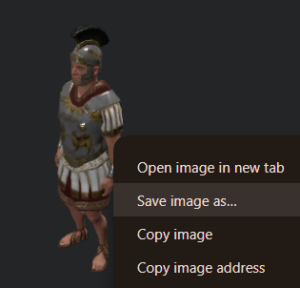
- Select the file and right click on its thumbnail to Save it for later use
- Create a new space > Add Content > import your avatar
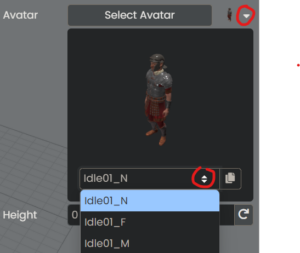
- To test if everything is correct, check if your avatar is in Idle position in the thumbnail and click the drop down arrow besides Select Avatar and click the animation selection arrows, there should be a list of 11 animations:
- If all looks and animates correctly, add the suffix – AI Avatar like so:

- Rotate them 180 on the Y-axis
- Add Content > Free Content > Snippets > Setup Your Virtual Assistant and make it a child of your avatar:

- Select your AI Avatar from the drop down menu and edit the other fields if wanted:

- Select the Avatar spot again (all children will be selected as well) > click the 3 dots > Export…

- Save the Collection in [relevant folder]
- Rename it to Julius – AI Avatar like so:

- Click Attach Preview Image and attach the thumbnail image you saved at step 11
Congratulations, you have created a new avatar!

